RC Car 1/8 Scale (Radio Controlled cars)
In my limited spare time I do also a bit radio-controlled modeling. This started already when I was still at school and was only 14 years of age (looong time ago...). The hobby started with planes, boats and so on, nowadays it mainly concerns R/C cars.
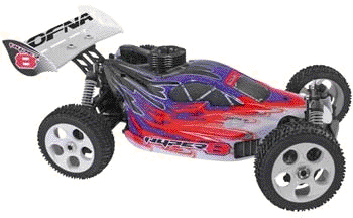
The car I use now frequently is the HoBoa Hyper7Pro. I bought it 2006 in Malaysia when I was on buiseness travel there. The car has a .21 cubic inch nitro powered engine of about 2PS. The buggy type of car can reach speeds upto 70 kmh.
Here is an picture of one the buggies I drive. It is the Hyper8 with axial 28 engine.
After using the Hyper7Pro for a few years to bash around in the street
and in a local park, the engine would no longer start after using (warm engine). I converterted to Rotostart so I could extent the start-procedure
without getting so tired arm... Also this turned out not the best solution and I started orienting what the best option was from here.
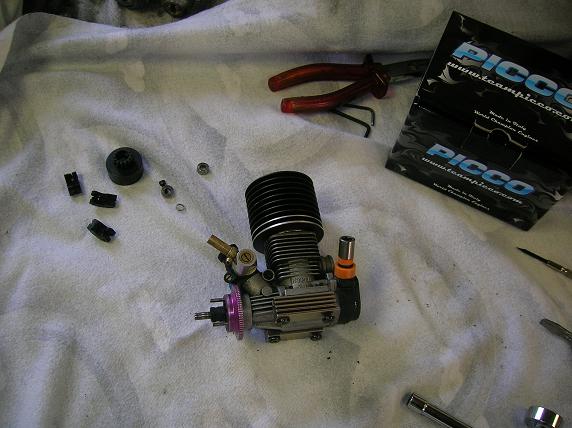
I decided to get new part was best to do. As I used the car not for competitions, only for fun, I bought the best value for money engine, the Picco .21 basic.
Many users in forums report it a behaving very well, some judge it a 'canon'. As also my clutch was worn out, I also bought these parts to get all back to good shape.
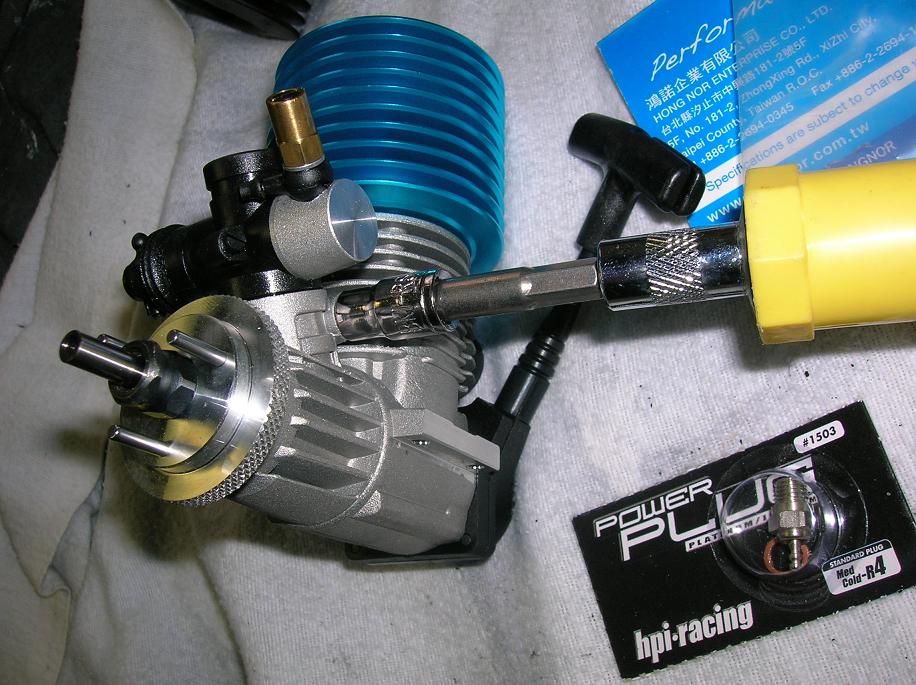
I first took the parts from the old Hyper.21 engine that I needed to re-use. The nut that holds the flywheel in place is a part I needed in the new setup.
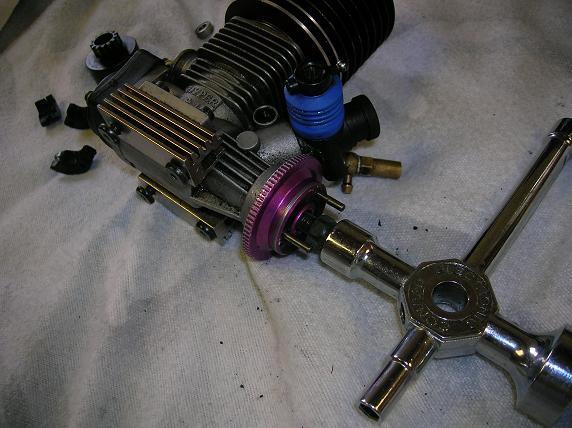
This picture shows the multi_tool that is also used to replace glowplugs, tyre_nuts and so on. It has the correct shape to unscrew
the nut that holds the flywheel in place.
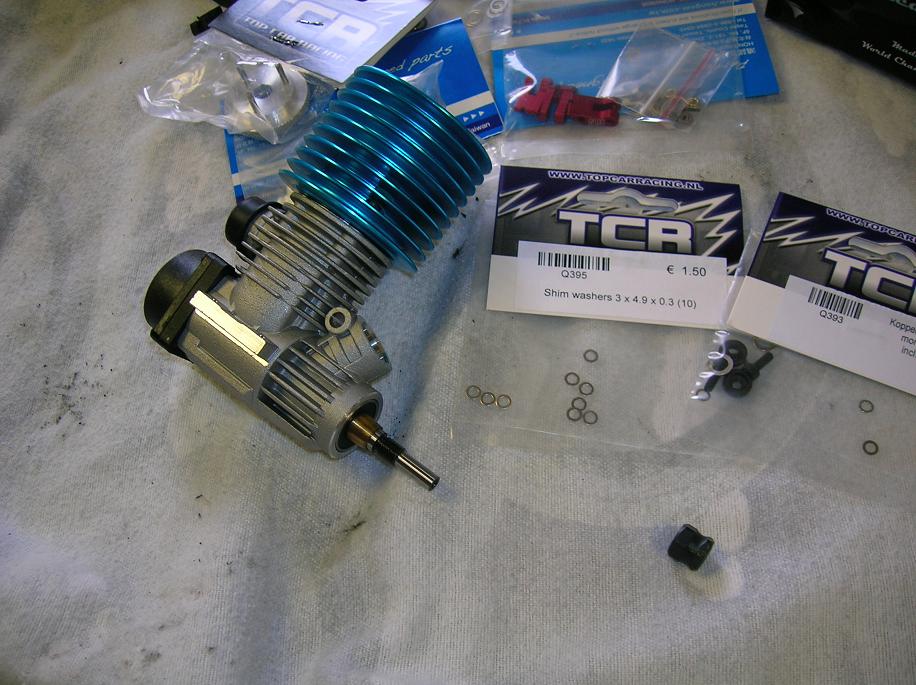
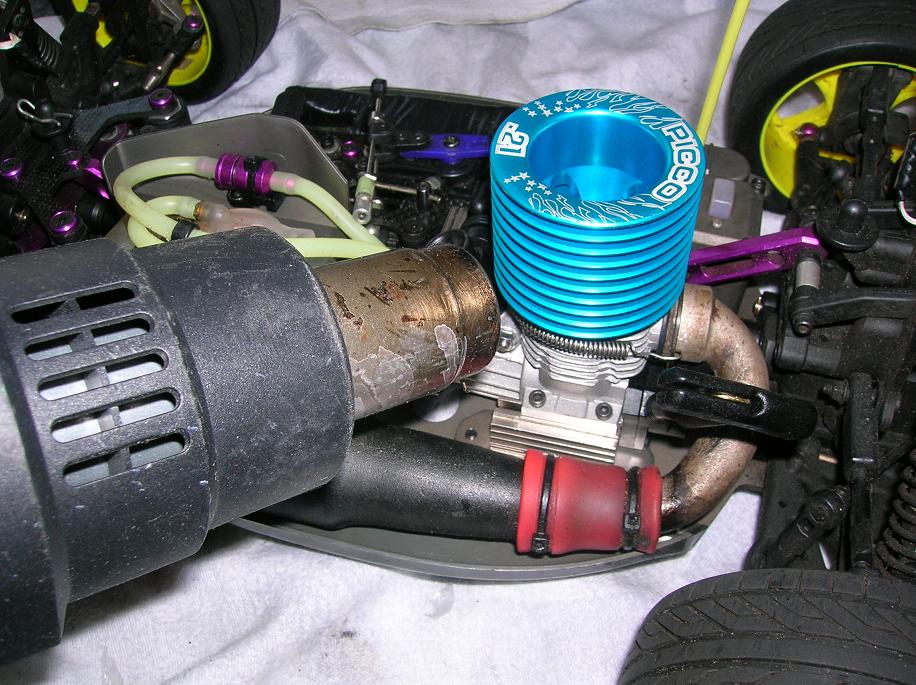
In the picture to the right you see the brand new Picco .21 engine surrounded by some new parts that were purchased at the same shop.
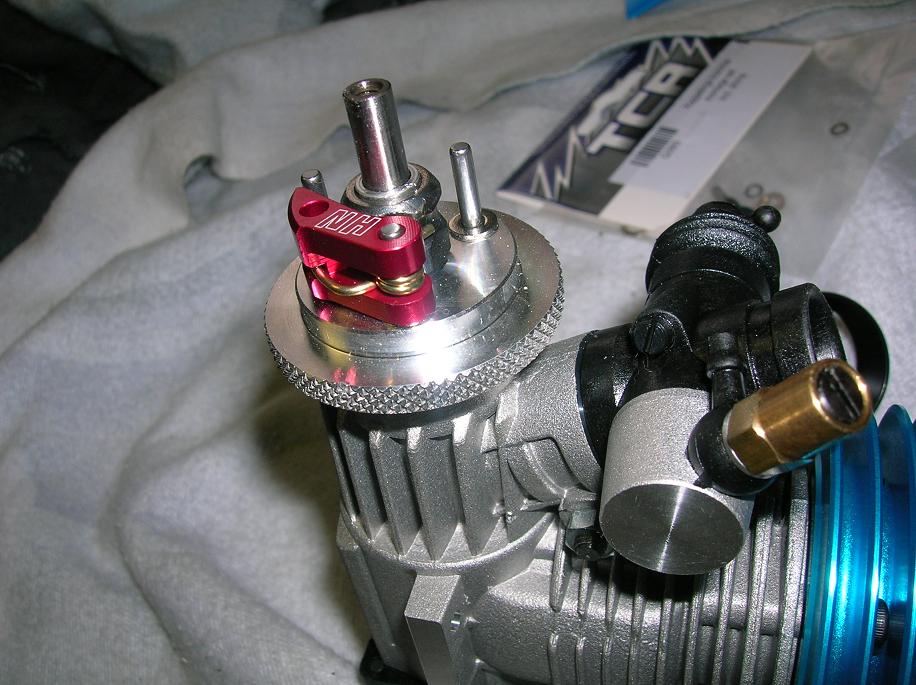
What I now needed to do first was to assemble the new clutch. It started by mounting the new flywheel to the crancshaft and fixate it by
using the old nut salvaged from the old engine.
In this picture I mounted the new flywheel, and work on placing the new carb. The carburatuer is a slyding type and supplied in with the engine. It is set by the factory, but
I will richen the stock-settings for break-in procedure. After the carb is placed, it is time to mount the 3 clutch-shoes...
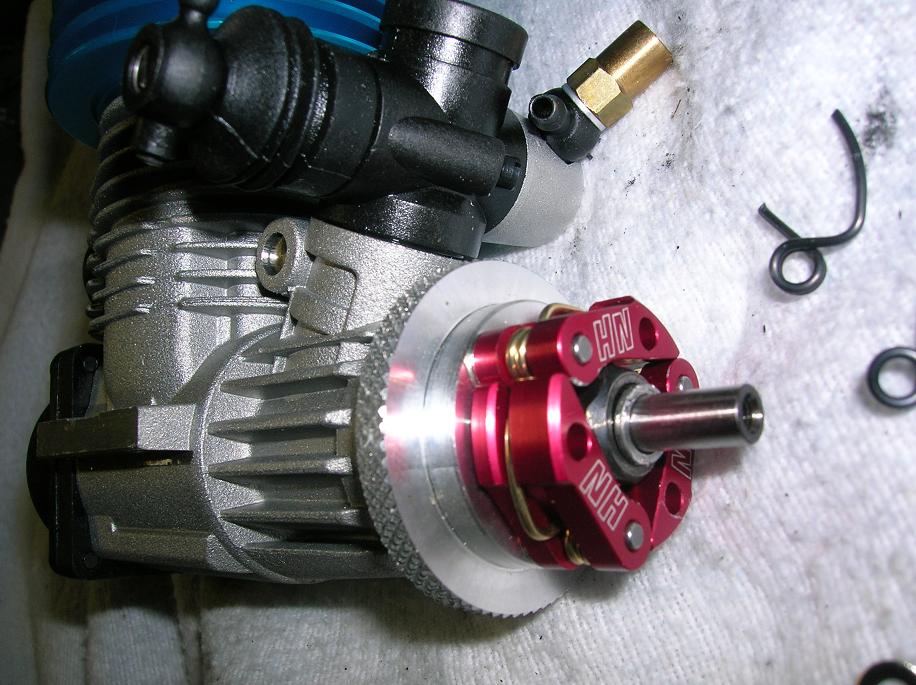
Normally one uses a special tool to mount the small springs in the 3 clutch-shoes, however I have seen people using a small screwdriver to do that.
I decided to give that a try, trying to save some money. It worked without a problem! Here the first of 3 clutch-shoes is mounted, the other 2 are
placed over the remaining 2 pins on the flywheel. The trick is to put some pressure by the screwdriver and at the same time press the clutch-show down.
One end of the small gold-colored spring will slip into the small rim of the nut that holds the flywheel in place.
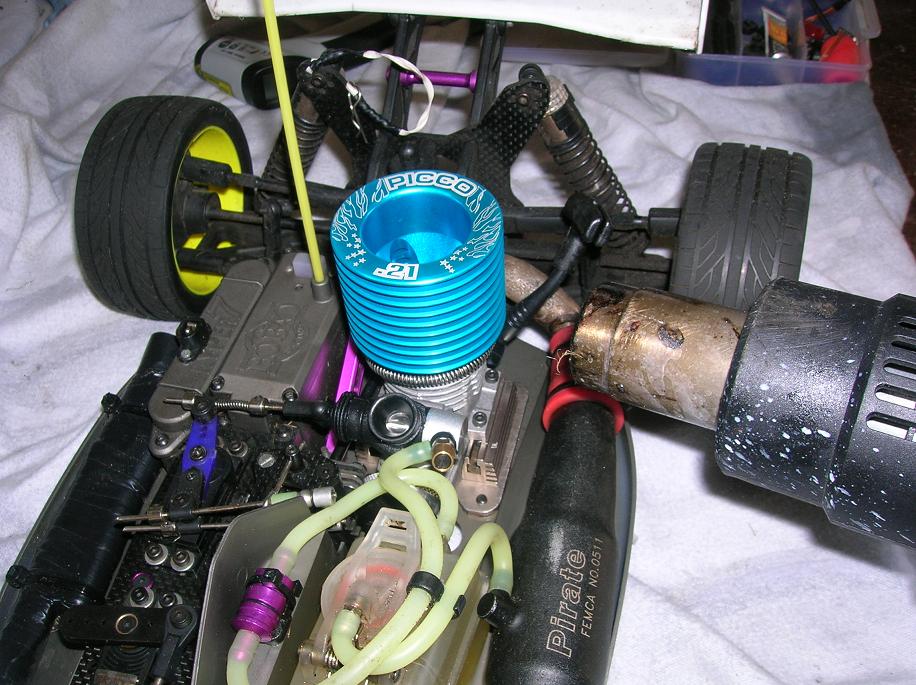
All 3 clutch-shoes installed...
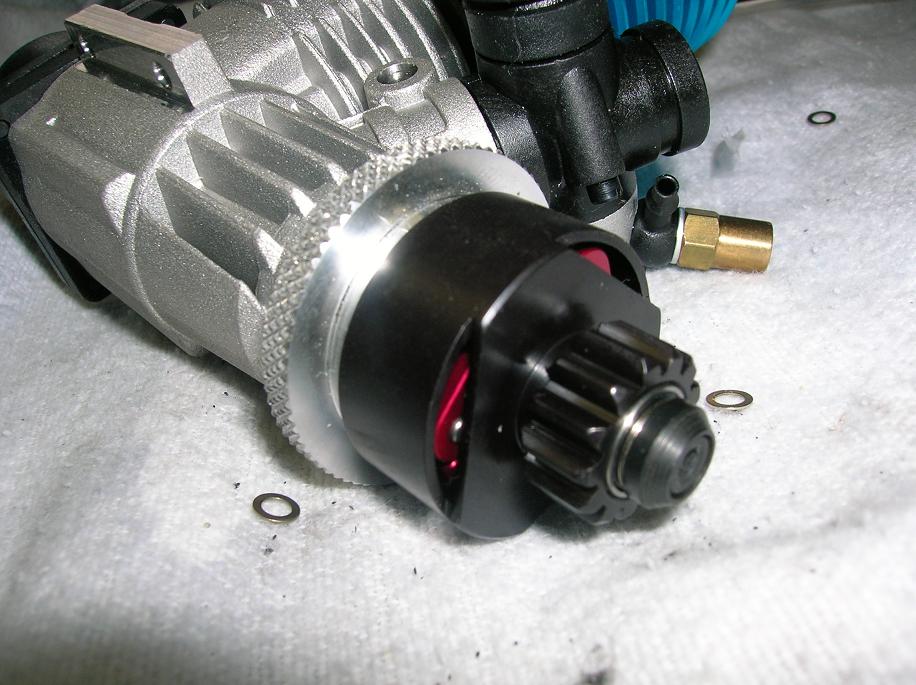
Clutch-bell installed. The red clutch-shoes are visible through the vented clutch-bell.
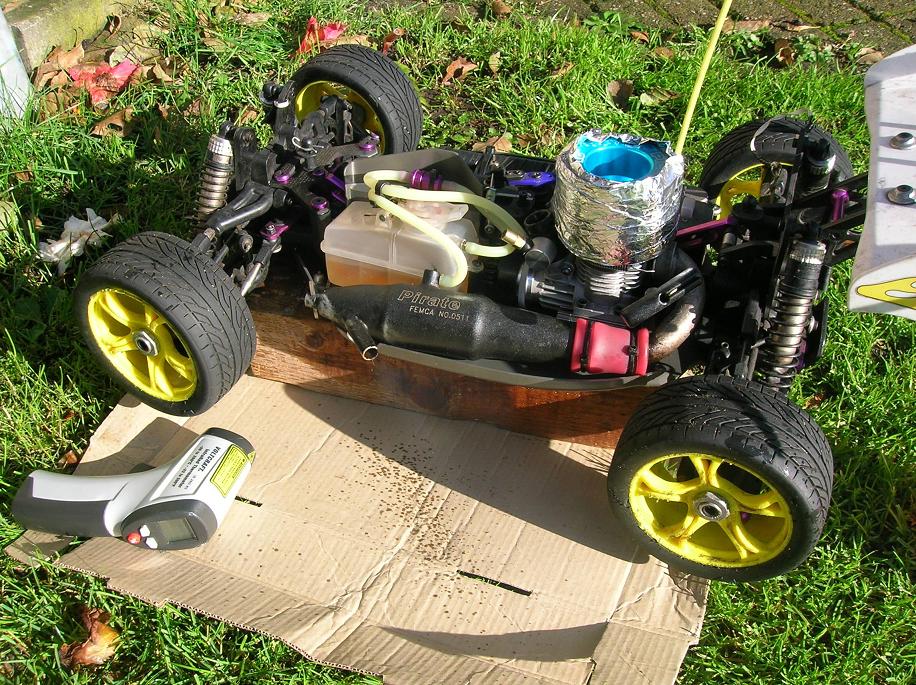
After installing the new power-plant back onto the chassis, it was time to start it up. I used a heatgun to get the cylinder and piston to higher temperature. This is needed
because the new engine is very tight at top dead centre (TDC).
Preparing to start_up for the first time.
The engine is running idle! It looks it was easy, but I needed to take the engine out the chassis 5 times because it got stuck at TDC while pulling the starter rope...
I had to use a plyer to rotate the flywheel and place the piston back at lowest position. Then install the engine and pull the starter. Finally I got it running.
Youtube shows some video-footage; search for: Hyper7pro Picco .21 breakin
The car is running with small dots of throttle after idling for 5 tanks, carefully monitoring the engines' temperature (90-95 degrees C, about 200 degr. F) in this video (Youtube: Hyper7Pro with Picco.21 sixth tank break in)
|